Showing posts with label author helps. Show all posts

Thursday, June 24, 2021

Book Review: Fight Like a Girl: Writing Fight Scenes for Female Characters

Fight Like a Girl

Writing Female Characters in Fight Scenes

Writing fight scenes is one of the most difficult aspects of writing fiction. Writing fight scenes for female characters is even more difficult. Especially, when you are not a trained fighter. If you're not careful, the scene comes across as a step-by-step, clinical action sequence rather than a cohesive, exciting encounter.

Fight Like a Girl is just what I needed to understand the difference in how men and women fight. The writing exercises give you a foundation to start with so that you aren't trying to pull a scene from the air while learning. 

She not only provides easy-to-follow examples, she critiques fight scenes in other books and explains why and how the attack or defense used would or would not work. And her humor makes a book that could be dry and boring fun to read.

Detailing the factual differences men and women use in fighting is so helpful. Due to being (usually) smaller and less strong than men, women just don't have the muscle mass to fight the same way men do. That doesn't mean women can't fight effectively, though. This book helps the untrained writer to write scenes that are realistic, yet exciting and engrossing.

I keep this book on my desk along with my other most used writing books.

Extract from Blurb:

Women are not men with mammaries. They don't approach, handle, or react to violence in the same way. Aiki Flinthart is a long-time martial artist, archer, knife-thrower, assault-survivor, and author of 11+ novels.

In Fight Like a Girl, she brings her own experience, plus the results of extensive research and interviews, to the table for fellow authors. 

Take care and stay safe,


Texas Ranch Wolf Pack Series


Wednesday, April 29, 2020

Dictation and Writing


Dictation and Writing


The most talked-about dictation software for authors is Dragon Naturally Speaking.  

After reading the reviews, it’s probably the best available. 

I would love to have it, but it’s not quite in the budget. Yet. 

With arthritis in my hands and fingers, typing isn’t always easy. 

I write in Microsoft Word which I subscribe to as part of Office 365.

Dictation Software You May Already Have


Imagine how thrilled I was to discover the newest version of Word now has a Dictate command. 

Does it work? Yes, but you have to be patient with it until it learns your voice. As with Dragon, you have to speak your punctuation. So you have to be patient with yourself, too, while you learn how to ‘write’ verbally.

In the newest versions of Word, the Dictate command is available on the Home ribbon. Click the down arrow below the Dictate command and select the language you wish to use. 

The first time you use the Dictate command, you’ll be prompted to enable permissions for your microphone.

To use the Dictate command, click it. The icon changes and displays a red dot. Speak into the microphone, remembering to speak your punctuation. When you’re through, click the Dictate button again to stop recording. 

Want to Learn More?


For more information, check out Microsoft’s Dictate your documents in Word

If you don't use Word, but use a Windows 10 PC, you can also dictate using the Dictation Toolbar in Windows. For more information on using Windows 10 Dictation, check Use dictation to talk instead of type on your PC.

Microphone Needed


You will need a good microphone for dictation. My personal choice is the Blue Snowball USB Mic. I purchased mine after I saw my daughter’s. I really like that the mic doesn’t have to sit right in front of your mouth. 

You can set it to be cardioid, omnidirectional, or cardioid with a -10 dB pad. I haven’t used the omnidirectional setting, yet, but with the cardioid setting, the recording is clear, and the mic doesn’t pick up background noise.

Do I use it? Not as much as I would like to. I’m still learning, and at this point, if a scene is flowing, I can type it faster than I can remember to stop and speak the punctuation as I go. However, I am practicing with it so that I can eventually do most of my ‘writing’ by ‘speaking’ my story out loud.

Do you use dictation in your writing? If so, do you use Dragon, Word, or some other method of dictation recording?


Later,


Need Some Binge Reading? Check out the Texas Ranch Wolf Pack Series!

Wednesday, October 23, 2019

Author Helps: Ping Your Blog Post

Author, Ping Your Blog Post


This is a revision of a post I made on a different blog several years ago. At the time, I was teaching computer information system classes. Now that I am working to build my authoring career, it seemed this information would be helpful to other authors, too. 

The basic information has not changed, but I have added context for authors trying to find new readers through their blogs. For purposes of this article, I am assuming you know little to nothing beyond using a browser and posting on your blog. This is not intended to insult anyone, but I want to make sure authors unused to technical aspects of the Internet understand.

Get Your Post Indexed by Search Engines


You might ask why you want your post indexed by search engines, such as Google. If the post is not indexed, it won't come up when someone searches a key phrase for your page. Eventually, search engines will find your post, anyway, but why not give them a boost and help them find it sooner?

What is a ping? Why should I ping my blog posts? This article will answer those questions and give you some pointers on how to go about it. Before readers can read your blog post, they need to be able to find it. While you may have some faithful, regular readers, everyone wants their blog to grow in readership. Like a single drop in a calm pool of water, a ping ripples throughout the Internet (figuratively speaking) and notifies search engines that your post exists.

What Does Ping Mean?


Ping, in the computer world, is a software utility program that allows users to determine if a site or connection is working. A message is sent to a site or connection, which results in a message back to the originating computer that the connection worked.

Pinging is one of the most important SEO basics that every blogger needs to know. What is SEO? SEO stands for search engine optimization and simply means to use techniques, such as pinging, to help search engines find your posts.

In blogging, the definition of ping is a bit different. Blog pings send a message to a server, search engine, or another site to let them know there is something new to crawl. When you ping your site or your post, search engines send spiders (bots or programs that read and index the information on a site)  to crawl your site or page to index it.

Once the page is indexed, it is searchable through search engines. This will help others find your post since it will now come up in the natural (i.e. unpaid) search engine results.

Why Should You Ping Your Blog Post?


Again, pinging notifies search engines, directories, and other websites that your post exists or has been updated.

The coveted, but elusive natural traffic afforded by Google, Yahoo, Bing, and other search engines comes from being indexed by these sites. They can't index sites they don't know exist.

Will they find your post without pinging? Yes, eventually, but we all need traffic sooner than that.
Pinging reduces the time it takes to get your post indexed, therefore, it reduces the time it takes for your post to come up in natural search results when users search for your key phrase.

How Do You Ping Your Blog Post?


There are many web sites that provide this service for free.  To use most of them, navigate to the site, type in your post title, then type in (or copy and paste) the URL to your post. My favorite pinging site only requires the actual URL of the post and allows you to post multiple URLs at once, one per line.

Some services will require you to fill in a captcha textbox.  Many people consider captcha tools as annoyances, but they are important to separate human generated requests from machine or computer generated requests for pings.

This reduces the load on the service provider's server and makes it possible for you to use it.  Otherwise, it would be like getting a busy signal every time you try to call someone.

When Should a Blog Post be Pinged?


When you create a new post, you should ping the page. If you return to the post and make changes or improve the page, you should ping again. If you reference the post anywhere, ping the URL (the Internet address) of the reference.

Consider this example. When I post to my author's blog, I open a new NotePad window. I copy and paste the following URLs to NotePad, one URL to a line:

  • the URL of the actual post  (find this in the browser address bar)
  • the URL of the Home page of my site
  • the URL of each Facebook page where I post about the blog post (my personal Facebook page and my author page)
  • the URL of the Pinterest pin I make for the post. 
Next, I select and copy the list of URLs, open the pinging service site I use, and paste the list into the box. While there are others that are effective, I prefer to use PingFarm, because I always have multiple URLs to ping.

At PingFarm, you can ping a hundred or more sites at one time. Just paste a list into the box (make sure there is only one URL per line) or you can upload a text file (the file ends in .txt) list of URLs only. You won't need the blog title for this service.

Alternatively, you can paste individual URLs to the textbox, one to a line. If you post more than one URL to the line, the ping utility is confused. When all the links you want to ping are pasted or typed into the box, click Mass Ping, and you are done with all of them at once, which can save hours if you have lots of pages to ping. This is the reason I use PingFarm almost exclusively.

However, pings should only be done occasionally. If pings are done too often, you will first be warned, then possibly banned from the pinging site. Only ping your URL when you have made changes, such as added or updated content.

Some pinging services ping the same sites, directories, or search engines as other ping services do, so it is important not to use overlapping ping services. Choose one and stay with it.

Why? If you use http://www.pingler.com/, don't also use http://www.pingomatic.com/. These sites ping many of the same index sites and will cause issues for you.

How Soon will my Post be Indexed?


You might ask, "How soon will my post be indexed after it is pinged?"

Your post will be indexed after the search engines or directories send spiders to crawl your site. There is no way to determine exactly how long it will take, but if you wait until the spiders eventually crawl your site, it may take months.

Using Ping ensures that your post will be indexed as soon as possible. It could take as little time as twenty-four hours, or as much as a week or more. It depends entirely on the workload on the servers sending spiders to crawl your site. Pinging reduces the time required for indexing.

Recommended Ping Services


Ping services I have used:


There are others, but if you use too many or ping too often, you risk your efforts being considered spinging, or spam pinging. Again, choose one and use it, rather than using all of them.

If you want to know more about pinging services, a quick Google search on "ping services" will provide you with several sites that have comprehensive lists of these services.

Later,


Texas Ranch Wolf Pack Series Link
Texas Ranch Wolf Pack Series


Wednesday, January 30, 2019

Creating DIY Book Ads

DIY Book Ads for Indie Authors

Create Your Own Ad


Are you an indie author? Need some visuals for your book ads, but can’t afford an artist or don’t have the photo manipulation software or skills to create it yourself?

This article will provide a way to create your own advertising with tools you may already have and tools available for free online. And because you are using the background image you choose, it isn't likely anyone else will have the exact same ad for their books.

Tools You Need


 The instructions in this article assume:

  • You have Word 2013 or Word 2016 installed on your personal Windows computer.
  • You have the cover art for your book.
  • You have access to the Internet.

 That’s all you really need. Okay, let’s get started.

Download a Background Image


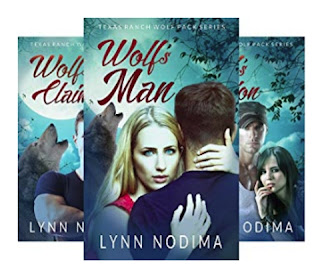
You will need a background image. Don’t try to find an image that exactly matches your book. What you’re looking for here is a mood or theme photo. For instance, my PNR series, The Texas Ranch Wolf Pack Series, uses a full moon on each cover. Many of the covers also have the image of a wolf.
As my example, I am going to use an image from publicdomainpictures.net, but you can select a photo from any free stock photo site. I’ll post a list of places to find free images at the bottom of the post.


After downloading the free image, I will open it in a Word document. Okay, if all you ever use Word for is to write documents, this is going to be fun. And enlightening!

Adjust the Image


Click on the photo to select it. Look at the right end of the menu tabs on the ribbon. See the highlighted Format tab? That’s the ribbon tab that contains all the important photo editing options.


To Darken the Image


The first thing I want to do with this image is darken it. The tools we need for this are on the Format tab, at the left side of the ribbon, in the Adjust group. Click the Corrections arrow. For this ad, I want the colors dark, so I selected the second image on the bottom to get the dark lighting I want. Okay, now I want a little more blue in the photo.

To Change the Color Tone 


In the Adjust group, click the Color arrow. Under the Color Tone heading, I will select the first image (4700 K). Now the color is right for this ad.

Create a 3D Cover Image


For the next step, I need to go online to get my cover photo in a 3D format. Derek Murphy graciously provided the 3D Cover Creator for authors to use. The link is https://diybookcovers.com/3Dmockups/.

 For this ad, I want an e-reader image, so I will select Single, then select the second image on the bottom row. Click Next.

On the next screen, I upload my Wolf’s Man cover, then click Next. On the next screen, scroll down below the images you uploaded, then click PNG or JPG. Since I need the image to have a transparent background, I select PNG.

The image is rendered as a 3D cover on an e-book.

(Derek Murphy created this wonderful tool and kindly shared it with the author community. BTW, Derek also helped me with the design for the cover. Many thanks, Derek!)

Next, I need to add this image to my first image. While I could copy and past the image on top of the other, there is a better way that will give me more control over this image.

Add a Shape to Hold the Book Image

Unselect the image you’ve been working with in Word. Click the Insert tab. In the Illustrations group, click the Shapes arrow and select the Rectangle shape. Click on top of the original image and drag and draw the rectangle shape.

Right-click the rectangle shape, and select Fill at the top of the shortcut menu, and then click Picture…

Navigate to find the 3D Cover image you created. (Mine is in my Downloads folder.)

Resize the image by pulling on the resizing handles at the corner of the image.

Format the Rectangle Shape

To remove the border around the Rectangle, with the shape holding your PNG file selected, click the Shape Outline arrow in the Shape Styles group, and select No Outline.

Move the book image until it is in the location you desire.

Add a Call-to-Action 


Add another Rectangle shape to hold the ad text. Add a Rectangle Rounded Corner shape to hold your call to action. Right-click the Rectangle Rounded Corner shape, click the Shape Fill button, then select the color you desire for the background of the call to action.


For my ad, I will select Dark Blue in the Standard Colors section. Right-click the Rectangle Rounded Corner shape again, and click Outline, then select No Outline.

Right-click the Rectangle Rounded Corner shape again, and click Add Text from the menu. Add the call to action text.

Change the font to the desired font (I’m using Lato Semibold for all text.) and change the size to fit the shape.

Add Your Advertising Text Right-click the remaining Rectangle shape. Click Add Text.

Type the text you want. Change the fonts, font colors, and font sizes of the text as desired. Now, I need to do something about the background of the text.

The following actions are the reason I used a Rectangle shape to add the text instead of inserting a Text Box. Click on the Rectangle shape holding your ad text. Click the Format tab.

To fade the edges, in the Shape Styles group, click the Shape Effect arrow. Hover the pointer above Soft Edges, and select Soft Edges Options at the bottom of the menu. With Soft Edges selected in the Format Shape dialog box, type 7 pt in the Size box. (Ultimately, I decided not to use this option.)

At the top of the Format Shape dialog box, beneath Shape Options, select the Fill & Line button (looks like a paint bucket).

 Click Fill. In the Transparency box, use the roller arrows to set the Transparency to the best percent. Set Transparency to 100%. If you need a little color behind. After removing the background color, I decide I don’t need color behind my text for it to show up. Alternatively, I could have clicked the No fill radial button and achieved the same effect.

Using the Snipping Tool


Next, I will use a tool that came with your Windows Operating System. Click the Start button at the bottom left corner of your screen. Scroll through the Apps List and click on Windows Accessories, then click Snipping Tool.

In the Snipping Tool window, click Mode and select Rectangular Snip. Use the crosshair pointer to draw a rectangle around the ad image. If you have too much empty space on your image, here is where you can crop it while making the image into a JPG photo.

FYI: The image will be saved at a low-resolution, which is great for using on the Internet. Unless the specs have changed recently, a computer monitor will only display about 72 pixels per inch, so a low resolution photo looks great and a blog post or online ad. Another plus is that it won't be a memory hog and slow down your blog post when it's loading.

The Snipping Tool window opens again showing the image you selected. If the image is what you want, click File, then Save As, and give your new ad a file name.

If the image is not what you want, click New, and try again.

And there you have it, folks. A DIY ad to use in your book advertising. It may not be as sharp as a professionally created ad, but it serves the purpose.

Have fun!

Places for Free Images 


These are just a few of the available sites for free images. Again, be sure you select an image that doesn’t have a recognizable human on it and doesn’t show product details. Even though they are available on these sites, and the site says they are free, you have to be careful about using them.

www.publicdomainpictures.net 
www.pixabay.com
www.unspalsh.com
www.pexels.com


If you're interested in checking out the book in the advertisement, you can find it on Amazon.

Later,